Below is a list of archived enhancements and bug fixes deployed to Asset Essentials.
2025 Release Notes
Enhancements to GIS Mapping
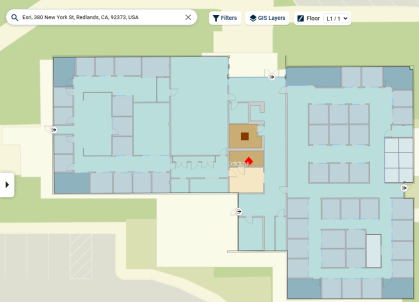
Asset Essentials introduced significant enhancements to GIS mapping in the web and mobile applications. These improvements are designed to make map functionality more intuitive and user-friendly, greatly enhancing your experience and productivity.
This exciting new update opens up the ability to visualize ESRI indoor maps in Asset Essentials. With this new functionality, you can see assets and associated work orders within their building floor plans. Functionality is available to clients with an Asset Essentials GIS Mapping license.
With these updates asset data will now be able available to sync 2-ways between Asset Essentials and ESRI. This syncing and direction (1 or 2-way) can be controlled per field, allowing you to fine tune the fields you want your maintenance teams to update and which ones need to remain as they are in ESRI. To use 2-way sync capabilities you may need to adjust the feature layer settings in ESRI.
The new mapping experience maintain key functionality you are accustomed to from in the current map. You are able to view, move, edit, and create work orders and your filter options remains the same, ensuring you can continue to easily identify work. We have preserved the user breadcrumb details in the new map to help identify your team members that are close to an emergency work order to respond quickly.
To help save you time and reduce your clicks, we’ve updated the results panel. Now, when you select an item on the map, any feature, work order, or breadcrumb that is selected will show in a single results panel for you to review. We’ve also made improvements in the display of information
These improvements leads to increased user satisfaction and reduce the time it takes for your users to become proficient with our mapping tools to complete tasks more efficiently.
Smarter Preventative Maintenance
We are excited to introduce a new powerful integration between Smart Assets and Asset Essentials (AE). This update automates the collection of critical equipment metrics, such as run hours, by syncing Smart Asset sensor data directly with AE meter titles once per day. This means:
-
No more manual data entry for technicians - freeing up time for higher-value tasks.
-
Improved accuracy in meter readings - reducing the risk of human error.
-
Reliable preventative maintenance scheduling - based on actual equipment usage, not estimates.
By connecting the sensor data and leveraging AE's Preventative Maintenance module, administrators can ensure maintenance is triggered precisely when needed. This helps extend asset life, reduce downtime, and maintain compliance with operational standards.
With this enhancement, asset managers gain greater confidence in their maintenance programs and more control over resource planning and equipment performance. Refer to Adding a Meter Title to learn more.
Security Enhancement - Allowed Email Domains for Self-Registration
Overview
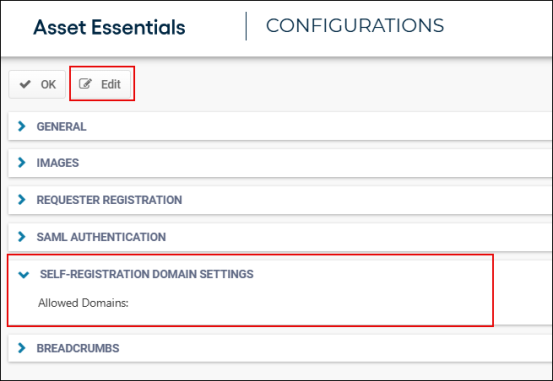
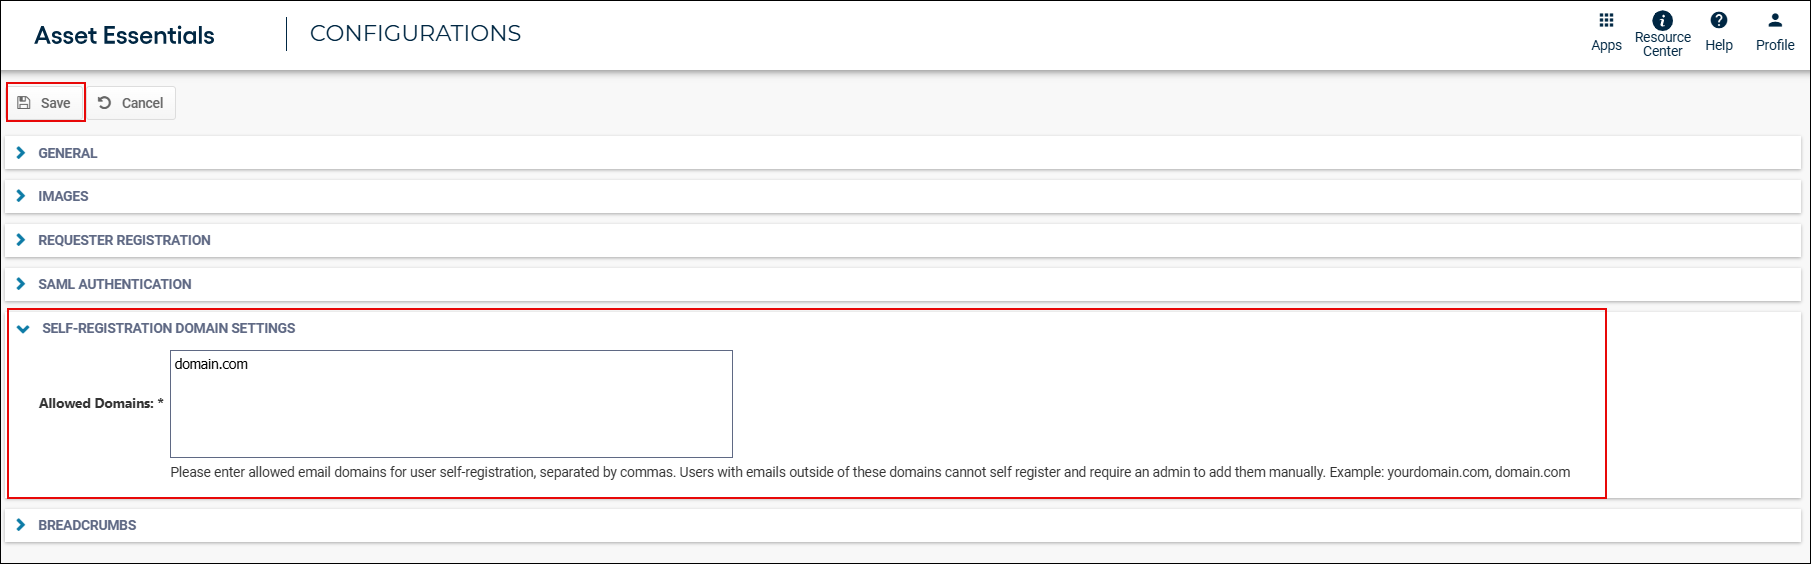
The new SELF-REGISTRATION DOMAIN SETTINGS section lets you to choose which email addresses are allowed to sign up for your account. To do this, type the email endings (like gmail.com or school.edu) into the box called Allowed Domains. To enter multiple email endings, put a comma between each one (like gmail.com,school.edu). This field is required.
*Note: An Admin or other user will need to add new users manually who do not match the allowed email list. For more details visit the Adding a User help page. For SAML clients using SSO, if your Allowed Domain does not match your SAML email configurations then new users will not be auto created on first login.
Adding allowed email domains for Requester Self-Registration
-
Log into Asset Essentials.
-
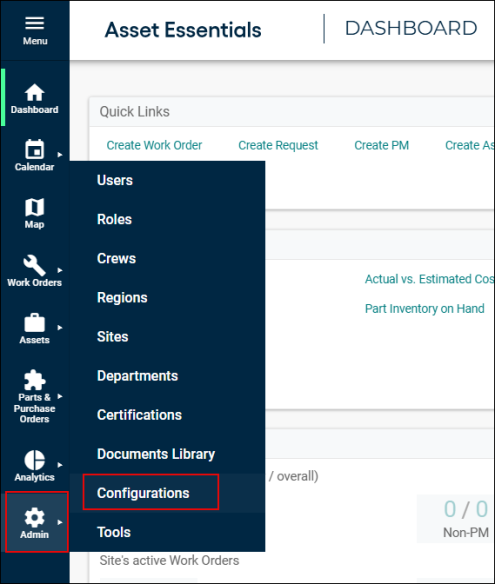
In the left-hand menu, click Admin, and then select Configurations.
-
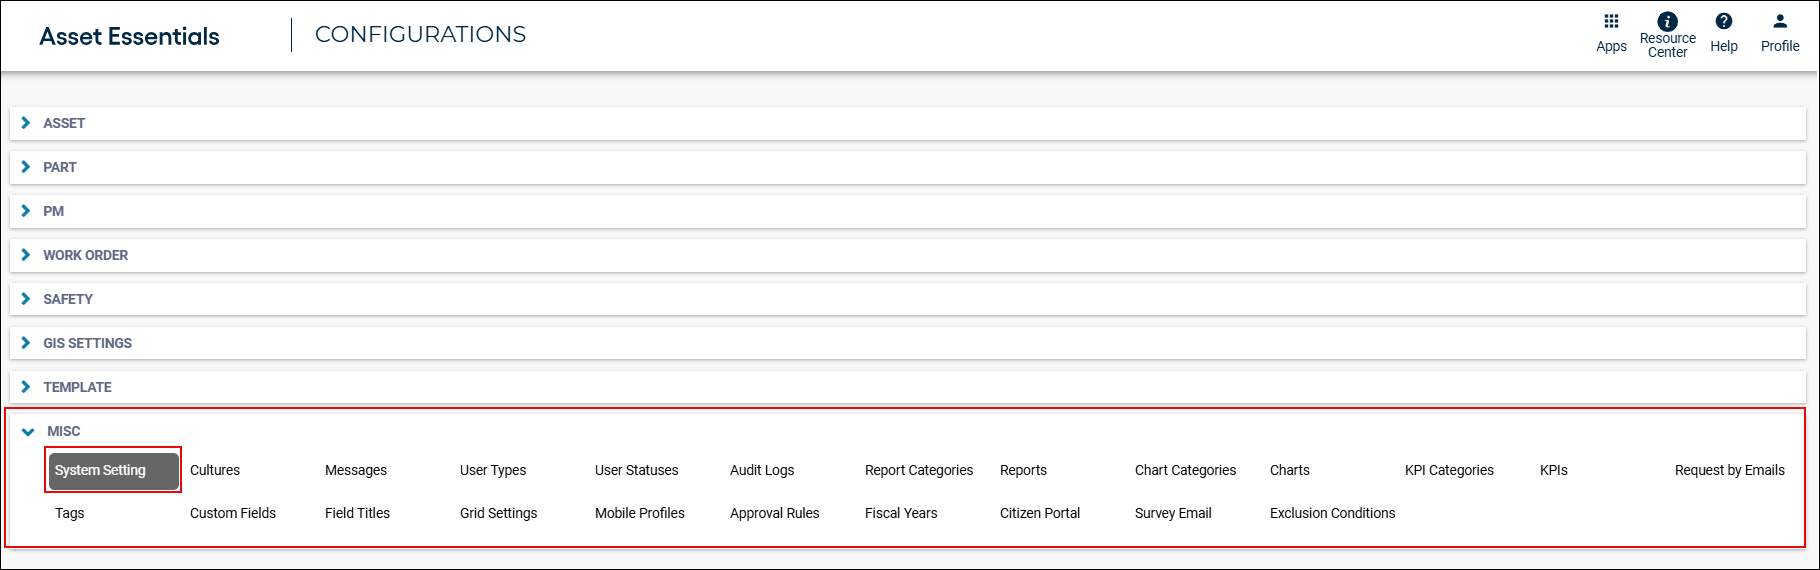
Navigate to the MISC section, select System Setting.
-
At the bottom of the page there will be a section called SELF-REGISTRATION DOMAIN SETTINGS. Click Edit to enter the domains of the email addresses that should be allowed to self-register as a Requester in the account.
-
Click Save to apply the changes.
In-App Comments
Overview
In-App Comments enhance communication for Work Requests (WR) and Work Orders (WO), ensuring seamless collaboration among requesters, technicians, supervisors, and admins. This feature helps maintain alignment on maintenance needs, site conditions, scheduling constraints, and repair progress, improving work efficiency. Previously, the AE Web platform introduced the Work Order Messages card for this purpose, but this capability was missing in the AE Mobile app, leading to communication gaps. With the new release, technicians and originators can access these messaging features on AE Mobile, ensuring they can view, post, and reply to comments directly from their mobile devices. This enhancement completes the communication loop across platforms, connecting users no matter their location or device.
WARNING
 Important: Ensure your device is online to use In-App Comments, as offline mode is not currently supported.
Messages Card Features
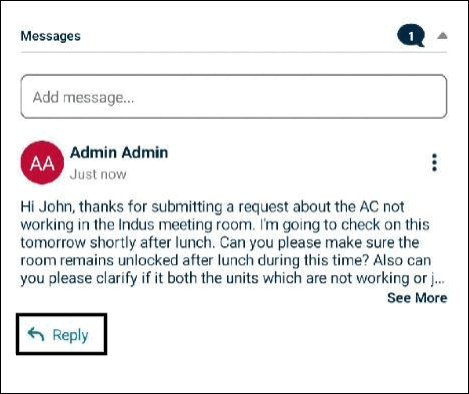
Starting a New Message Thread
-
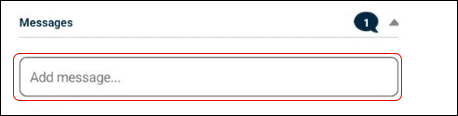
Access the text entry box at the top of the card to initiate new message threads on an accessible work order or request.
-
Messages posted here become the "parent" messages within a thread.
-
All replies to the thread will appear beneath the parent message, organized chronologically.
Replying Within an Existing Thread
-
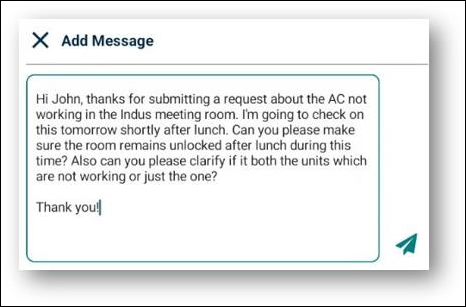
Tap the Reply button under a message to open an entry box on a new page.
-
Type the response into the entry box and tap the send
 icon to post.
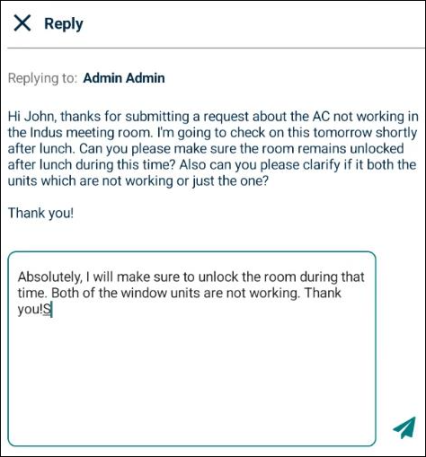
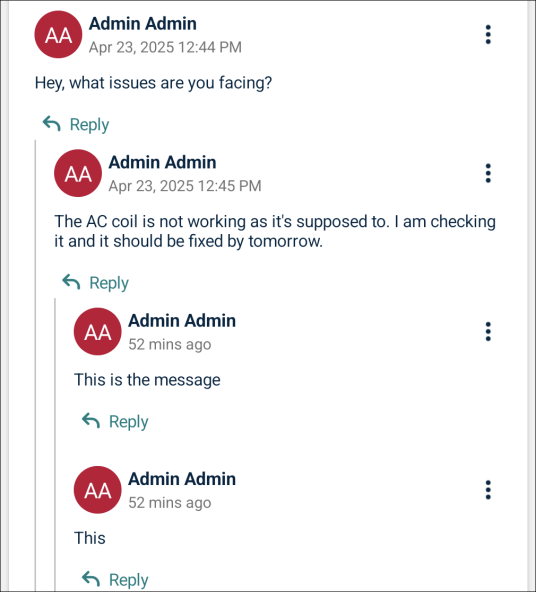
NOTE Messages display chronologically, with the oldest messages at the top and the newest at the bottom. Replies follow the same order within each level of indentation.
Threading
-
Threading is allowed up to three levels deep to maintain a clean interface. Replies beyond this level are grouped within the third level to keep the experience seamless and easy to follow.
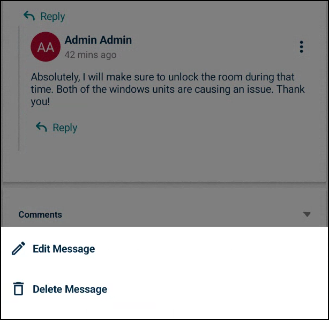
Editing and Deleting Messages
-
Users can edit or delete messages they created by taping the ellipsis
 icon.
icon.
-
An actions menu at the bottom of the screen provides Edit Message and Delete Message options.
-
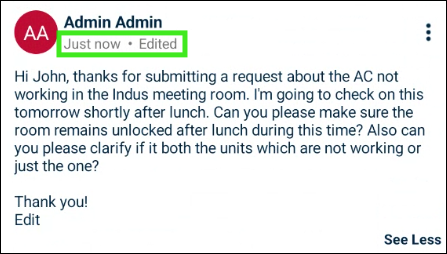
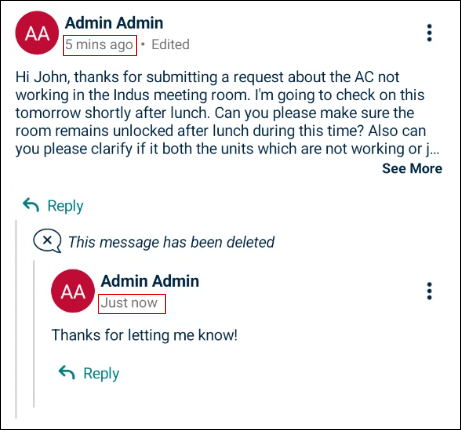
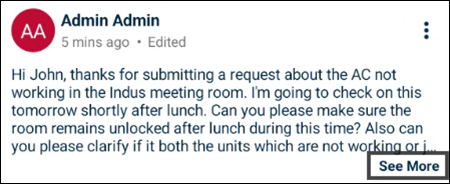
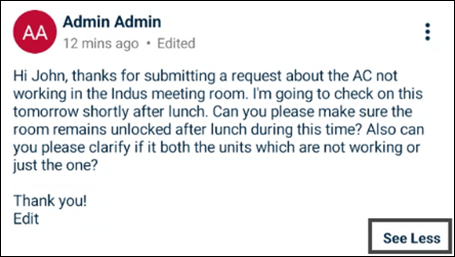
Edited messages are marked with an Edited tag and an updated timestamp such as Just now and more.
-
Despite the update, messages remain in their original order in the thread, sorted by when they were first posted.
Truncation and See More/Less
-
Comments exceeding 230 characters or five lines are truncated.
-
Users can expand comments with See More and collapse them with See Less
Messages Bubble
-
A bubble
 indicates the number of comments, including parent comment and reply messages, excluding deleted ones. For example, if you post 10 messages and later decide to delete 2 of them, the bubble will display 8. If there are no messages, the bubble does not display.
Configurability Options
Global Feature Enable/Disable Toggle
-
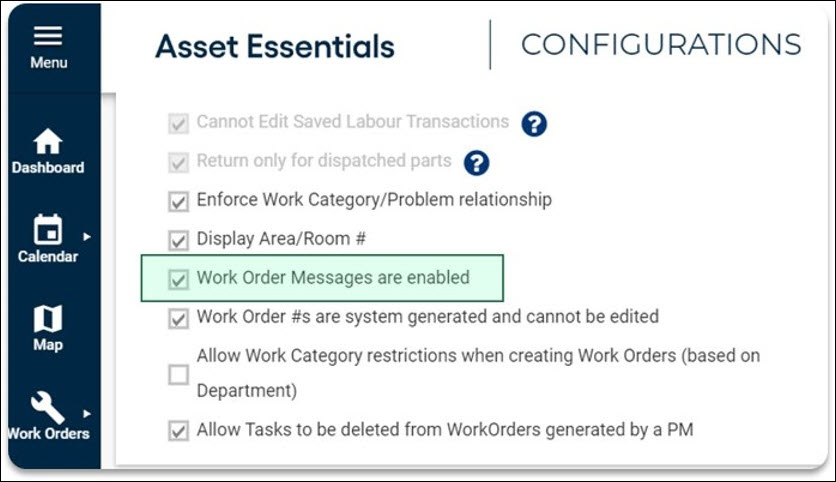
By default, the Work Order Messages feature is enabled for all accounts regardless of vertical/package.
-
Clients can disable the Work Order Messages feature globally via System Settings, requiring Global Admin access. Changes take place after browser refresh.
NOTE System Settings requires Global Admin access to AE. All AE Enterprise clients have access to a Global Admin account that can use the feature enable/disable toggle. For all other clients, our Support Team can make this change on behalf of the client.
-
AE – PO Approval Routing
We are excited to announce that the improvements to the Purchase Order (PO) approval work-flows is live now. This helps in procurement efficiency, reducing order processing times with pending approval notifications and easy approval work-flows. It also helps in control costs with clear spending thresholds and automated approval mechanisms to prevent unnecessary expenditures. Finally, clear approval work-flows, audit trail of approval and denial of a PO, enhance compliance with regulatory requirements and internal policies, mitigating risks, and potential penalties.
You will be able to configure each site with details about when the PO approval is needed. You will choose the Trigger Status which will start the approval work-flow and when the PO is approved or denied it will move to the respective next status. You will also be able to determine if you want a PO to be routed through approvals from the bottom to the top approval needed for the dollar amount (sequential) or just be routed just to the approvers associated with the range the dollar amount falls in (range).
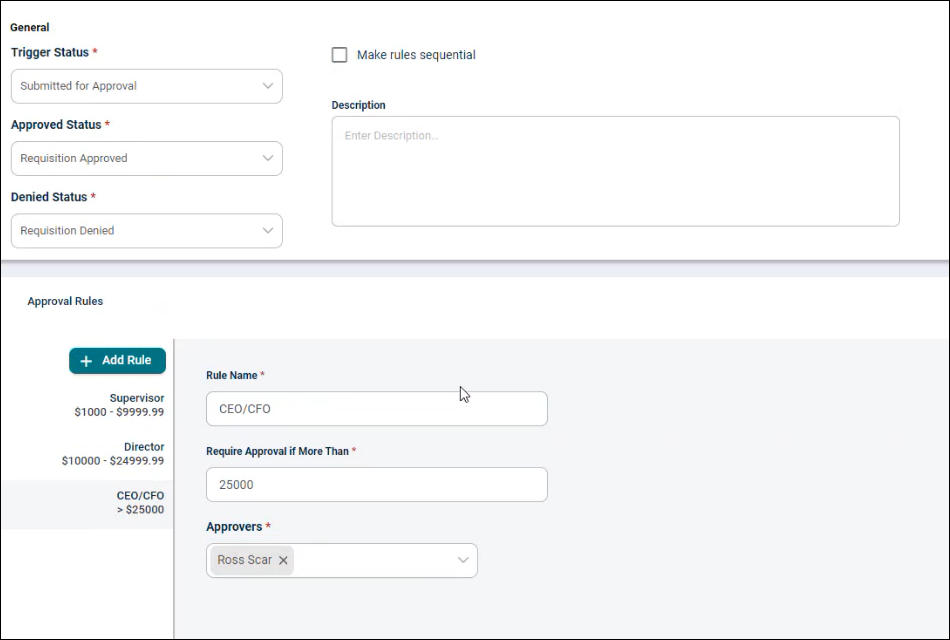
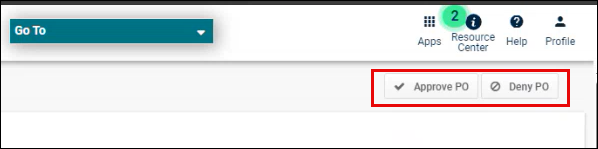
Once configured, POs that enter the Trigger Status will be routed based on the grand total of the PO. Approvers will get an email notification when it’s their turn to approve the PO. When approvers open the PO for review, they will see an Approve PO and a Deny PO buttons on the top right. Once approved, the action will be recorded in the audit log and the PO notifies the next approver that the PO is ready for them. If all approvals are met, the PO moves to the Approved Status configured. If an approver denies a PO, it moves to the Denied Status.
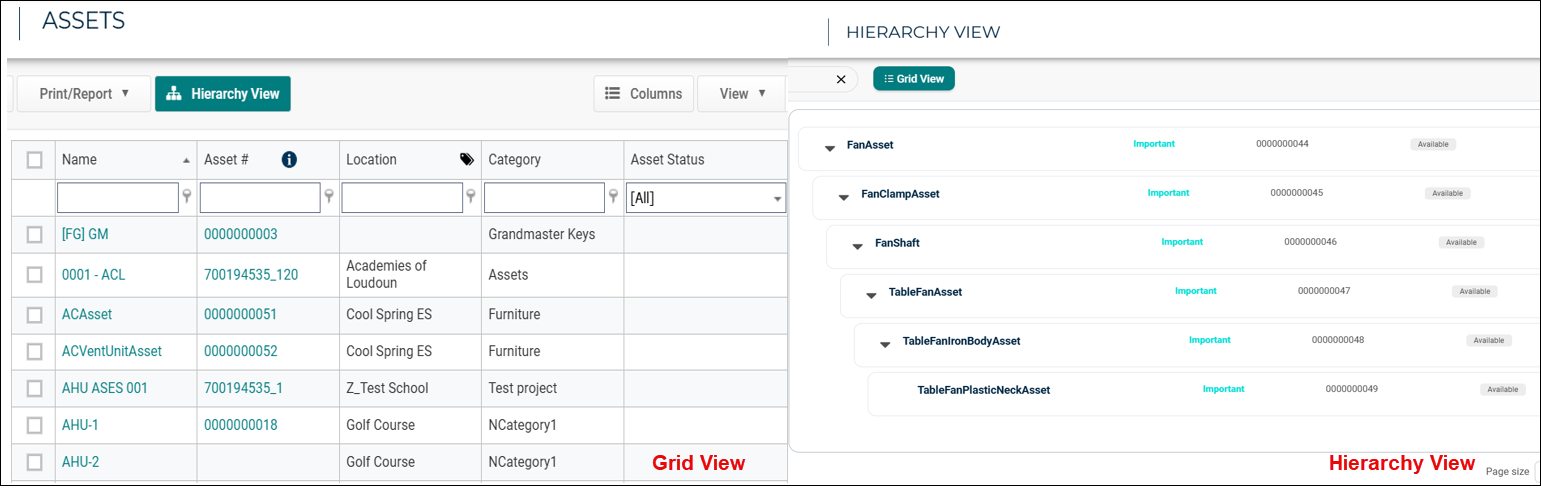
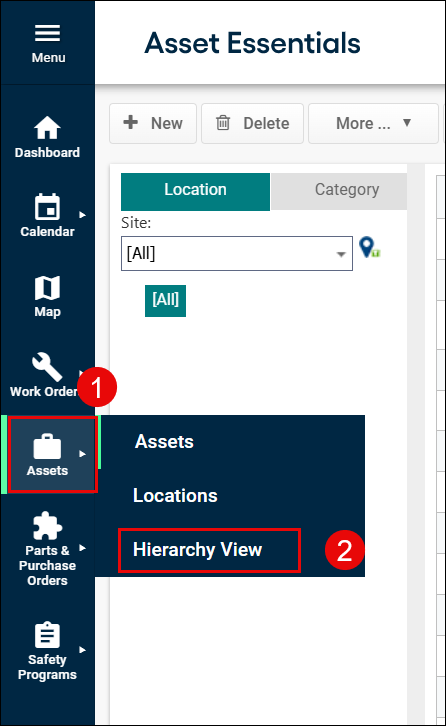
Asset Hierarchy
The Asset Hierarchy feature provides a visual hierarchy to display asset associations, showing parent-child relationships across six levels. This improves navigation, control, and simplifies tasks like work order (WO) creation and preventive maintenance (PM) scheduling. This user guide is designed for Asset Managers, Supervisors, and Technicians. *Note: The users that already having list in the Assets Grid view can see the list in the Hierarchy view.
Improvements to the Reorder Process
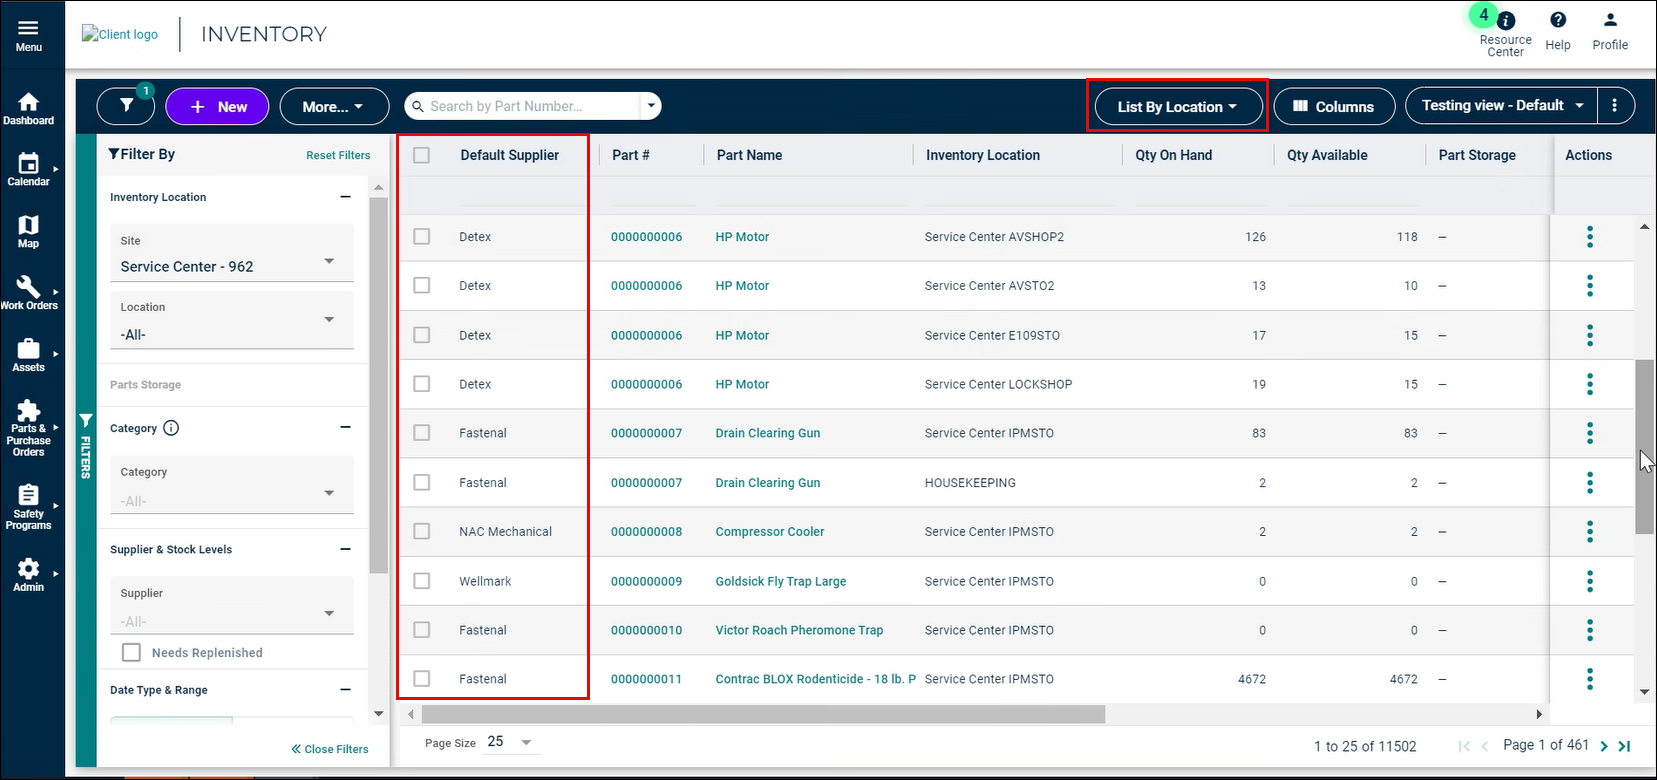
This release simplifies reordering with the new Generate Quick PO on the INVENTORY page, replacing the old process on the PARTS page. Use the List By Location to view Parts across various locations. Apply the Needs Replenished filter to find items that need reordering and procure them by using Generate Quick PO.
Default Supplier in Parts screen
The Default Supplier column is added to the PARTS page which will be used to order Parts in the Generate Quick PO process. This allows to set a preferred supplier based on factors like cost or delivery speed, making the process faster and more efficient.
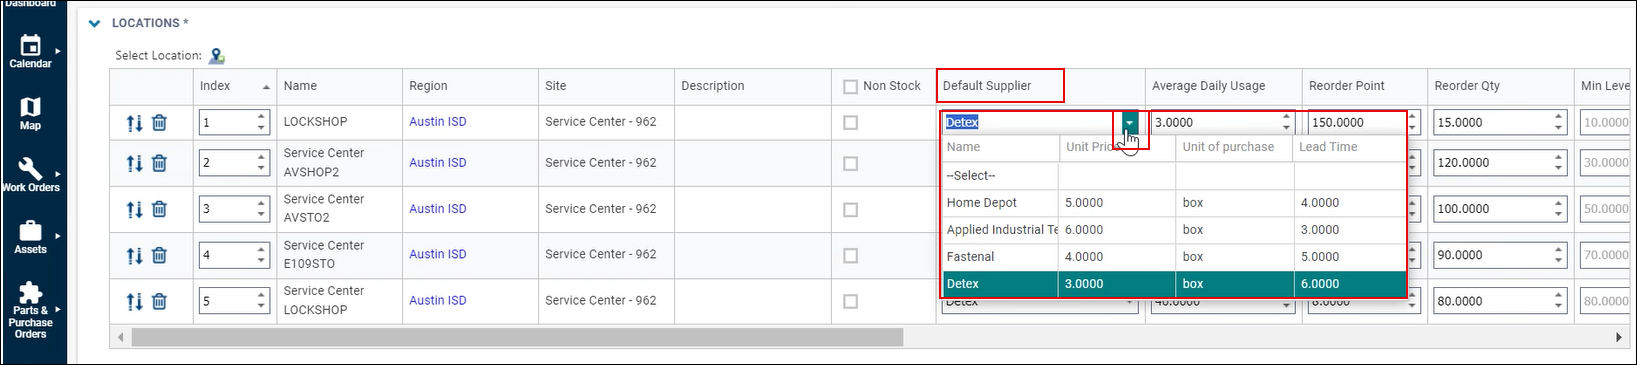
Default Supplier in Inventory screen
The Default Supplier column is added to the INVENTORY - List by Location option which shows the preferred supplier to be used to order Parts in the Generate Quick PO process.
Generate Quick PO
The Generate Quick PO screen recommends adding Parts to a new or existing PO.

-
If a PO with Created status category exists for the supplier as Parts Default Supplier, the system recommends adding the part as a line item to that PO, saving time and simplifying the process. Otherwise, a new PO is recommended for the part using the Parts Default Supplier.
-
The system pre-fills PO and Part details based on part information; however, there is a customization option also available if needed.
-
The PO details are editable for new POs.
-
The Part details can be updated for both new and existing POs.
-
Clicking on the light bulb icon provides additional detail about the Part which helps to make informed decisions and create optimal POs.


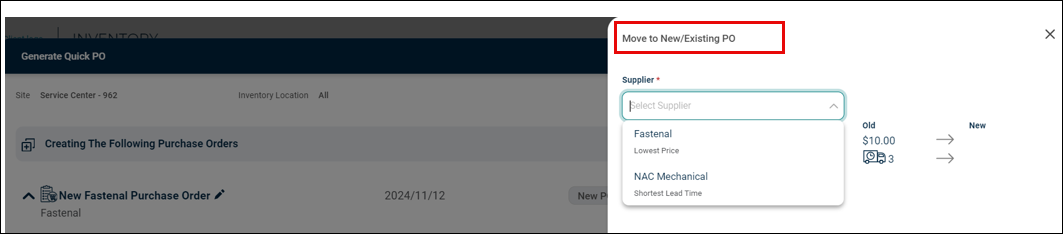
The Supplier of a Part can also be updated using the Move to New/Existing PO option. The system even recommends the supplier based on cost and delivery speed wherever possible.
The Purchase Orders Created and Updated screen shows the newly created or modified POs. Clicking on the PO # or title will open the specific PO in a new tab for further review or editing.

The Generate Quick PO process records the intended location for each part. When parts are received as part of the PO life cycle, the system makes sure they are received in the appropriate locations with the same quantities as ordered.
On Existing PO # in Inventory screen
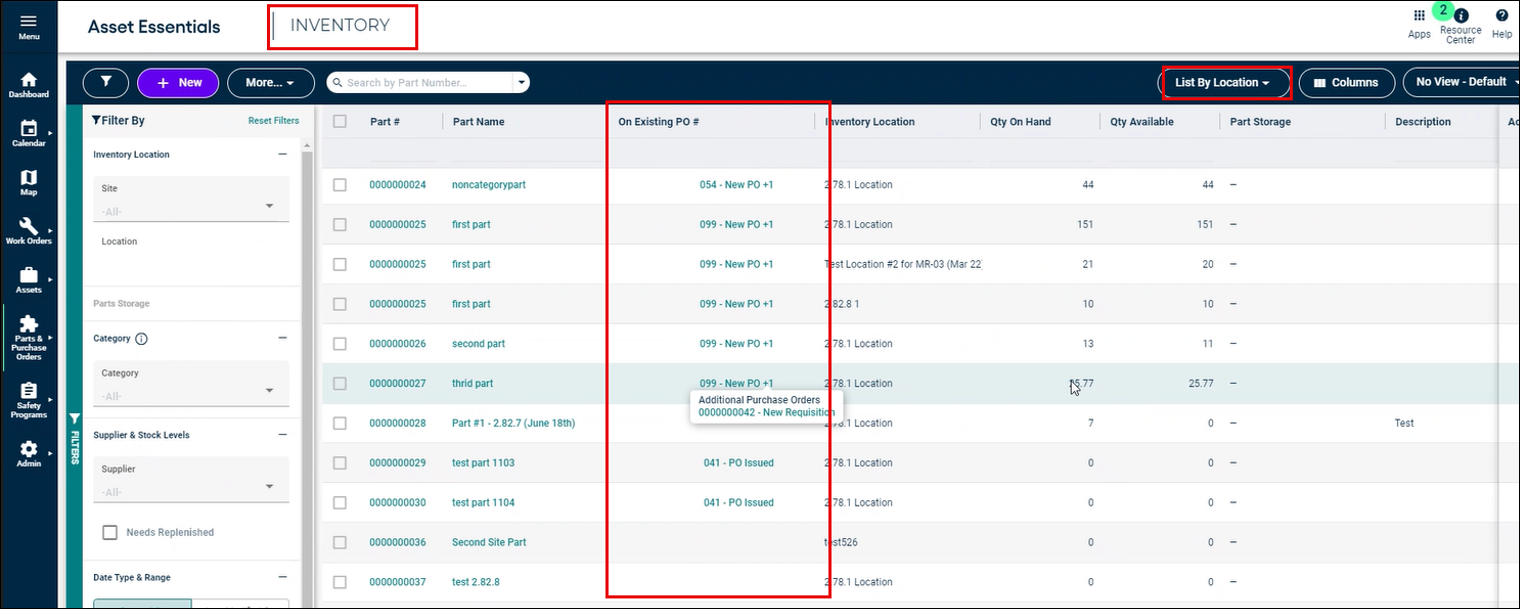
The On Existing PO # column is added to the INVENTORY page. This column shows if a part is included in an active PO (PO’s belonging to Status Categories - Created, Finalized, Pending, and Ordered). Clicking on the PO # will open the corresponding PO in a new tab.
New Logo on Login Page
The logo on the Brightly Universal Login page will be updated to reflect the Brightly Software logo. This change will help prevent confusion from users who were not familiar with our previous company name and branding. This change will not alter your login work flow in any way. Below is a sample of what the updated login page will look like.
![]()
Mobile Improvements
As part of the work order process flow, technicians must be able to access and view pertinent work order information quickly. They also need to be able to view this information in a way that best fits their needs.
As part of the initiative to help technicians manage their work and complete work orders more efficiently, the Asset Essentials Mobile team has reduced the Work Order Details Form load time and added additional sort options to the Mobile application, along with a few other enhancements.
Work Order Details Form Load Time
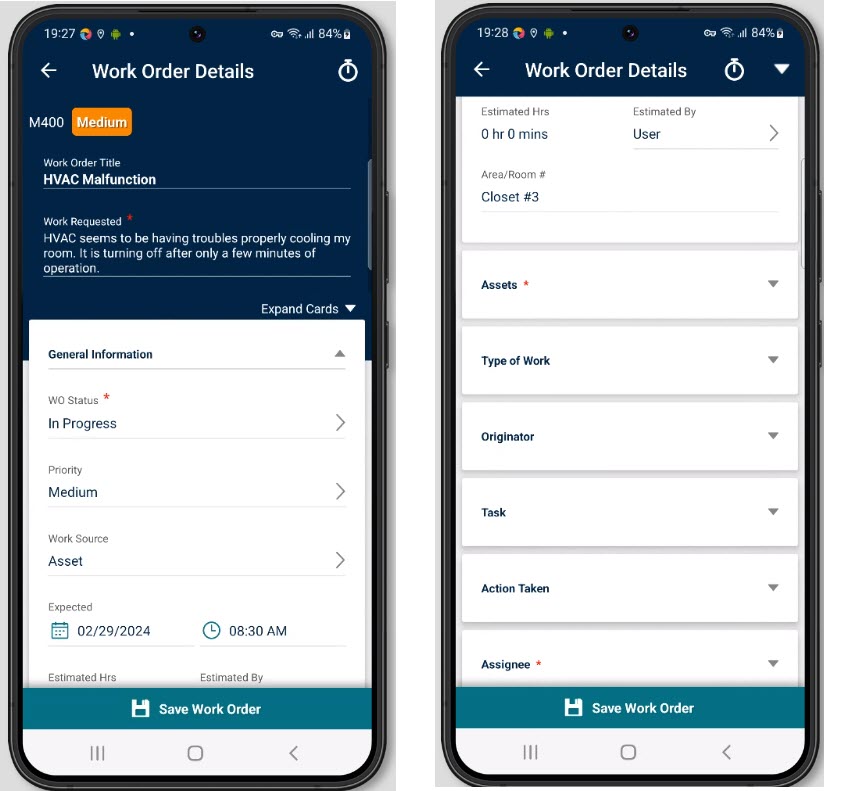
To improve efficiency and productivity for technicians, the Asset Essentials Mobile team has made improvements to the Work Order Details Form load time. This enhancement aims to load the Work Order details form faster than the older version of the application. We have achieved this by collapsing all the cards (excluding the General information card) and using placeholder cards when the Work Order Details form is opened. This enhancement will improve the efficiency by helping technicians to access relevant information quickly and return to completing Work Orders faster.
To see these changes, navigate to the Work Order list and open an existing Work Order.
Additional Sort Options
To enhance the application's usability, the Asset Essentials Mobile Team has introduced additional sort options to the Sort By functionality for Work Order, Asset, and Parts.
Along with this enhancement, we have added additional labels on the cards which now allows technicians to quickly sort the respective lists with the new options and arrange the list according to their liking.
Below are the changes in the respective modules:
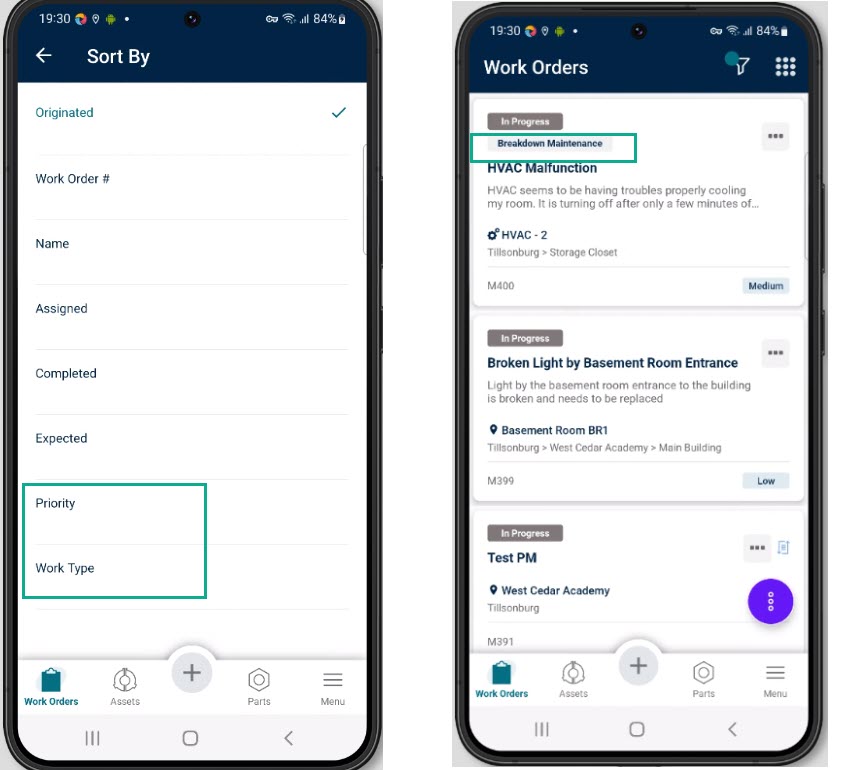
Work Order:
1. New Sorting options added
-
Priority - Users will now be able to sort their Work Orders by Priority in alphabetical order.
-
Work Order Type - Users can now sort their Work Orders by Work Order Type in alphabetical order.
2. New Label added
-
Work Order Type - a new "WO Type" label has been added to the WO card under the "Status" label.
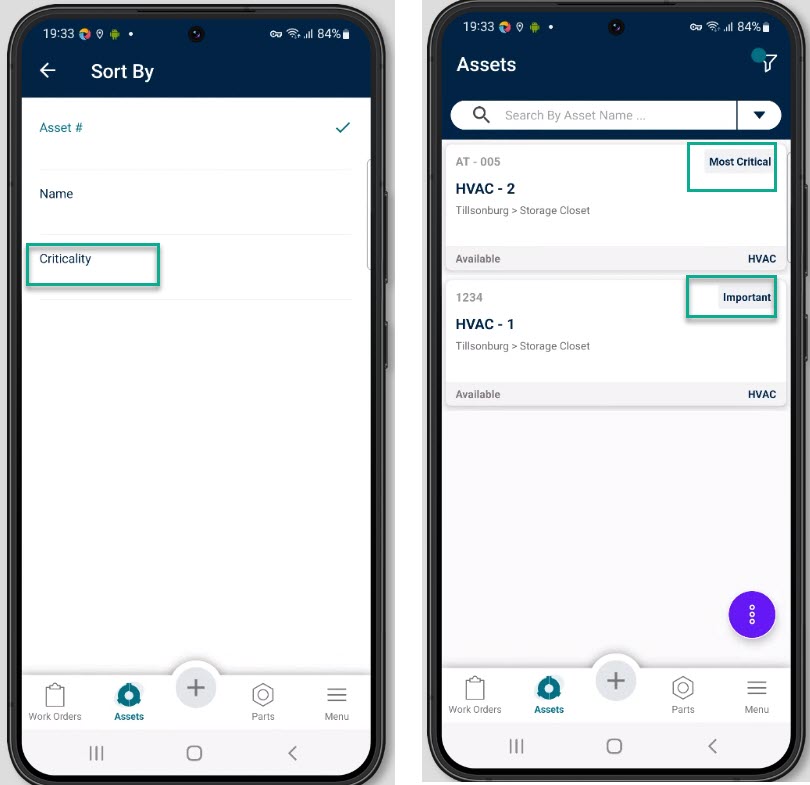
Asset:
1. New Sorting options added
-
Criticality - Users can now sort their Assets by the weight of the Criticality assigned in the Asset Essentials Web application.
2. New Label added
-
Criticality - a new label for the "Criticality" has been added to the Asset card in the top right corner.
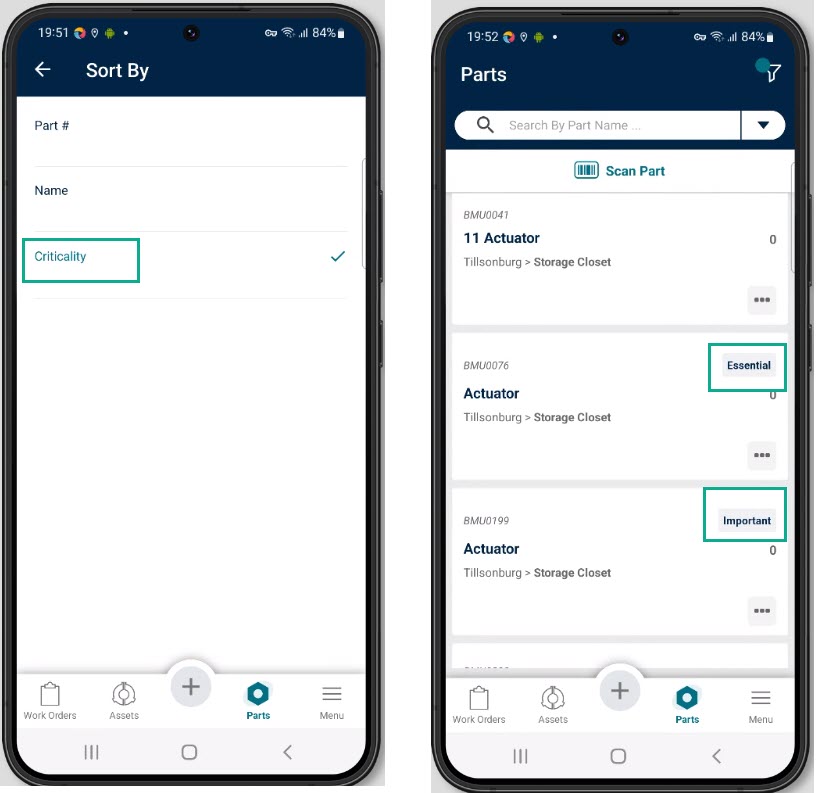
Part:
1. New Sorting options added
-
Criticality - Users can now sort their Parts by the weight of the Criticality assigned in the Asset Essentials Web application.
2. New Label added
-
Criticality - a new label for the "Criticality" has been added to the Part card in the top right corner.
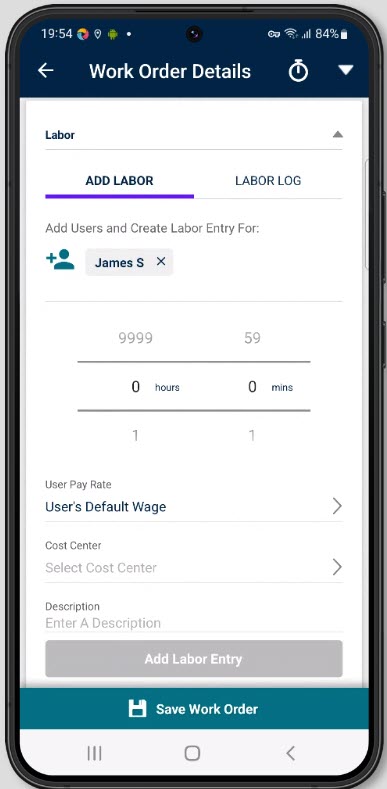
Work Order Labor Entry Description
With the release of this feature, the mobile team has created parity with the Asset Essentials Web application by adding the Description field to the Labor Entry card inside the Work Order Details form.
This Description field will allow technicians to enter a brief description for the time logged. This will improve reporting as managers can now understand the reason behind the entered labor entry.
To see these changes, go to the Work Order List, open an existing work order, and scroll down to the Labor Entry Card; a description text field will be visible.
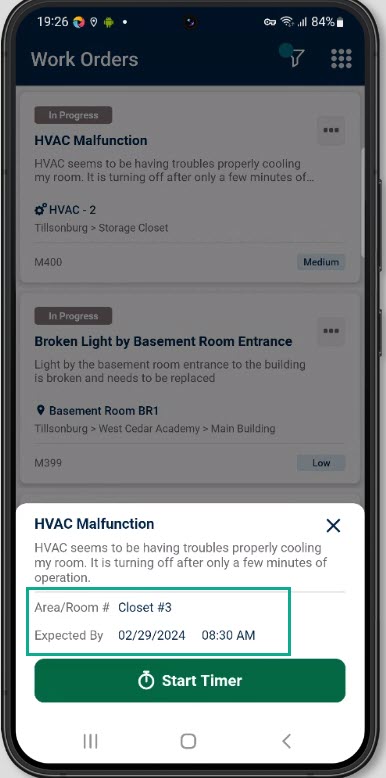
Work Order List UI Enhancements
As part of our efforts to provide our technicians with relevant Work Order details, the Asset Essentials Mobile team has added the Area/Room # and Expected Due Date/Time information to the Work Order list Quick Reference slide-out.
To view these changes on mobile, go to the Work Order List and click on the Ellipsis button on the top right-hand corner of the work order card.